Micro Aperture Measurement Technology & Image Measuring Systems
In the precision machining industry, we discuss the feasibility of product projects with customers, starting from a sheet of drawing. The drawing carries all the information of the workpiece, and its dimensions, tolerances, and machining methods including details of the customer's product, which is also the key to measuring whether we would undertake this project or not. "Machining according to the drawings" is a common practice in the metalworking industry. To know whether the machining is actually according to the drawings, measurement is a necessary procedure. Through measurement, we can know whether the workpiece is within the range of geometric tolerance, surface tolerance, and position tolerance, and meet the product quality requirements of the customers.
As far as measuring the aperture, common tools such as Vernier calipers, bore gauges, plug gauges, etc., are sufficient for measuring large apertures generally. When dealing with optical precision measurement with high precision requirements, three-dimensional measuring instruments are often used to measure various specifications of geometric tolerances. However, when measuring tiny holes with a diameter of 1mm or less on the workpiece, the three-dimensional measuring instrument will face the limitation of the CMM probe itself, which makes it difficult to measure the tiny holes. At this time, the non-contact optical measurement will be a more applicable measuring method.
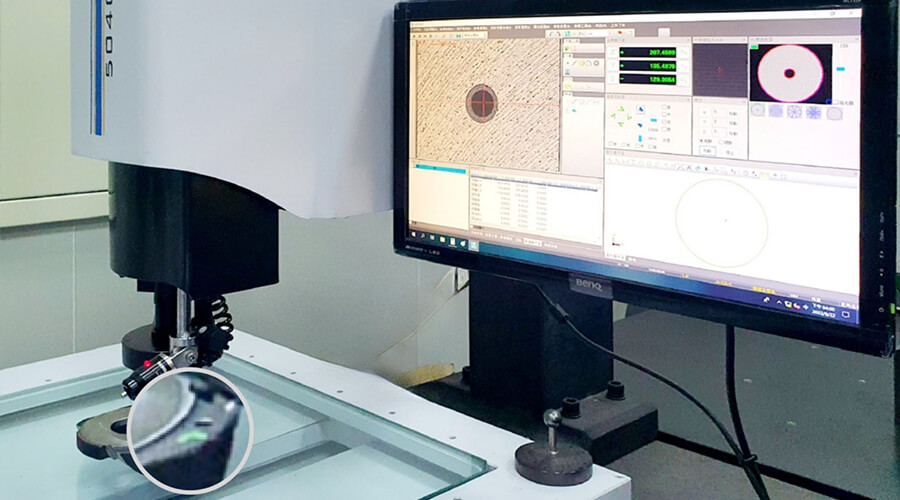
For the precise measurement of tiny apertures, we use image measuring instruments to obtain precise data with precise geometric tolerances by zooming in on the measured target. It can also synchronize a large number of measurements after programming for its programmable features, and quickly obtain the measurement results of the micro-scale of the workpiece.
For the basic measurement of tiny apertures, we can still know the diameter through pin gauges. The characteristics of GO/NO GO measuring tools like this are to give immediate feedback on aperture GO or NO GO. Other than that, it gives less precise data and human error possibilities, so this kind of measuring is more applied to sorting without knowing the precise dimension.
Through the above micro-aperture measurement examples, we can see that the three-dimensional has its probe limitation and the image measuring system would be a better precision measurement method under microscale measurement. While under quick inspection except for the precise dimension, needle gauges can play an effective role. Facing various workpieces with different dimensions and conditions, we’ve sorted out the most suitable measurement method for inspection, and help our customers shape a better world with precision quality.

